Skip to content

...

Showing posts sorted by date for query knitting stitch tutorial. Sort by relevance Show all posts

Diagonal Chevron Stitch

Diagonal Chevron Stitch
Easy step-by-step instructions

Looking for a textured knitting stitch that looks complex but is actually easier than it seems? Check out Diagonal Chevron Stitch Tutorial on Amazing Knitting.

This tutorial breaks down the 8-stitch, 10-row repeat clearly, with simple rules for reading the chart (RS rows vs. WS rows), plus easy, step-by-step instructions to help you get those beautiful chevron ripples that resemble gentle ocean waves or mountain ridges.

If you’re making a cozy scarf, blanket, or even a statement sweater, this stitch is a fantastic choice. ✅

👉 Please read the full tutorial here

How to Knit a 3-Color Pattern: Easy Step-by-Step Tutorial

How to Knit a 3-Color Pattern: Easy Step-by-Step Tutorial
Photos above © Susan's Knitting World

If you’re looking for a fresh project that adds a vibrant pop of color to your knitting basket, you have to check out this stunning 3-color knitting pattern. Using a clever combination of white, yellow, and gray, this tutorial demonstrates how to create a sophisticated, textured fabric that looks far more complex than it actually is. It’s a fantastic way to play with your favorite yarn scraps or create a high-contrast masterpiece for a new baby blanket or a cozy sweater.

The beauty of this easy knitting pattern tutorial lies in its rhythmic simplicity and fast-paced progress. Designed with a stitch multiple of 8 + 3 and worked on 3.5 mm needles, the pattern uses a slip-stitch technique that allows you to achieve beautiful geometric transitions without the stress of carrying multiple strands at once. Whether you are knitting for a little one or crafting a stylish accessory for an adult, the alternating rows create a professional finish that is both durable and eye-catching.

I highly recommend giving this a try—it’s an incredibly enjoyable project that builds quickly and keeps you engaged with every color change. From the crisp garter stitch base to the final alternating repeat, the steps are clear and rewarding. Click the link below to follow the full tutorial and start your next favorite knitting project today!

Full Tutorial: How to Knit a 3-Color Pattern

Checker Stitch Knitting Pattern

Checker Stitch Knitting Pattern
Photos above © Knit-charts

If you're looking to enhance your knitting skills, I highly recommend checking out the Checker Stitch Knitting Pattern. This unique pattern not only adds texture to your projects but also offers a fun challenge for knitters of all levels. The detailed instructions and helpful video tutorial make it easy to follow along and master this beautiful stitch. You can find all the information you need at the link below.

Incorporating the checker stitch into your knitting repertoire can bring a fresh look to your creations, whether it's for cozy sweaters, stylish scarves, or decorative home knits. With a variety of projects and patterns available, there's something for everyone. Don't miss out on the opportunity to elevate your knitting experience—head over to the link and start your next project today!

Full Post: Checker Stitch Knitting Pattern

How To Knit the Horizontal Herringbone Stitch

How To Knit the Horizontal Herringbone Stitch
Photos above © Mama In A Stitch

If you’ve been looking to add a bit of luxury and structure to your knitting projects, you absolutely have to check out this Horizontal Herringbone Stitch tutorial from Mama In A Stitch (Follow the link below). While the herringbone pattern usually looks incredibly intricate and intimidating, Jessica breaks it down into a simple two-row repeat that is surprisingly easy to master. It creates a thick, woven fabric that looks high-end—perfect for cozy cowls or sturdy tote bags. I love how she recommends sizing up your needles to keep the tension just right; it’s a total game-changer for this specific stitch!

Full Tutorial: Herringbone Stitch

How to knit shoes step by step

How to knit shoes step by step
The photo above © Sheep & Stitch

If you're looking for a cozy and enjoyable knitting project, I highly recommend checking out the tutorial on how to knit chunky slippers! This step-by-step guide is perfect for beginners and experienced knitters alike, providing clear instructions that make the process both fun and rewarding. With just a few materials and simple techniques, you can create stylish and warm slippers that are perfect for yourself or as thoughtful handmade gifts. Don't miss the chance to learn from this fantastic resource—visit the link for the full tutorial and start your knitting journey today! 

Full Post: How to Knit Chunky Slippers for Beginners

Knit Double Ankle Baby Booties

Knit Double Ankle Baby Booties
Photos above © Gülümseten Marifetler 

Want to knit a cozy pair of Double Ankle Baby Booties? This cute two-needle baby booties project features a tall, textured ankle section that gives the finished pair their distinctive look.

The project is demonstrated in a video tutorial by Gülümseten Marifetler. On this page, we've organized the essential project information, explained what makes the design interesting, and linked directly to the original tutorial so you can follow the creator's instructions.

Double Ankle Baby Booties at a Glance

Project: Double Ankle Baby Booties

Craft: Knitting

Category: Baby Booties / Baby Socks

Construction: Two-needle knitting

Feature: Tall double-ankle section

Tutorial Format: Video

Tutorial Credit: Gülümseten Marifetler

About the Double Ankle Baby Booties

These knitted baby booties combine a compact foot with a taller ankle section, giving them a cozy sock-like appearance.

The ankle is the feature that makes this project stand out from many traditional short baby booties. The extra knitted section creates more visual texture around the ankle and gives you another area where yarn color and stitch definition can become part of the design.

Knitted with Two Needles

One useful feature of this tutorial is its two-needle construction. That makes the project particularly interesting for knitters who prefer working back and forth rather than knitting small circumferences in the round.

If you've been looking at knitted baby socks but aren't ready to work with double-pointed needles or other small-circumference techniques, a two-needle bootie tutorial can be an approachable alternative.

What Makes the Double Ankle Different?

Traditional knitted baby booties often finish relatively close to the ankle. This design extends the upper section, creating the characteristic double-ankle look.

Besides changing the silhouette of the bootie, the taller upper gives the project a cozy appearance that works especially well with soft baby yarns.

A Small Project for Practicing Your Knitting

Baby booties are compact projects, which makes them useful when you want to practice garment shaping without committing to an entire sweater or blanket.

Because you need to make two matching pieces, booties also provide useful practice in keeping your tension and shaping consistent from one piece to the next.

Choosing Yarn and Color

The original tutorial should be your guide for the materials needed to reproduce the demonstrated booties. We have intentionally not added an unverified yarn weight, needle size, gauge, or stitch count here.

If you choose to experiment with another yarn, remember that changing yarn thickness or needle size can significantly change the finished dimensions of a small project like baby booties.

Color is an easy way to personalize the design. Soft neutrals can create a classic look, while brighter colors can turn the same booties into a cheerful handmade baby gift.

Before Knitting for a Baby

Baby feet vary considerably in size, so don't rely on appearance alone when choosing a project for a particular age.

Follow the measurements and materials provided by the original tutorial where available, and compare the finished size with the baby you are knitting for.

For baby projects, choose comfortable yarn and make sure all finishing is secure. Avoid adding loose decorative pieces that could detach during use.

Watch the Original Double Ankle Baby Booties Tutorial

The original video tutorial demonstrates how the booties are made. Use the creator's tutorial for the actual knitting sequence and construction details.

Watch the Baby Booties Tutorial →

Tutorial credit: Gülümseten Marifetler. Amazing Knitting does not reproduce the creator's video instructions. Please use the original tutorial for the complete knitting process.

More Baby Booties Knitting Ideas

Explore more baby booties knitting patterns, newborn booties, and baby socks knitting patterns from the Amazing Knitting archive.

Before You Start

Watch through the original tutorial before casting on so you understand the overall construction. Prepare the materials demonstrated by the creator and check the intended finished size before making the pair for a specific baby.

Easy Knit Boxy T Shirt 'Jeans' Pattern

Easy Knit Boxy T Shirt 'Jeans' Pattern
Photos above © Jessica Potasz

If you're looking for a cozy and easy knitting project, you'll love this 'Jeans' T-shirt by Jessica Potasz from Mama in a Stitch. It's a simple pattern that uses only knit stitches and basic shaping. You can make this shirt with any worsted weight yarn, but it looks especially nice with Lion Brand Jeans yarn, which is soft and has a denim-like color. This pattern is free and comes with a step-by-step tutorial. You can layer this shirt over a long-sleeve top or wear it on its own. It's a great beginner-friendly project that you can finish in a weekend.

Full Post: Easy Knit Boxy T Shirt 'Jeans' Pattern

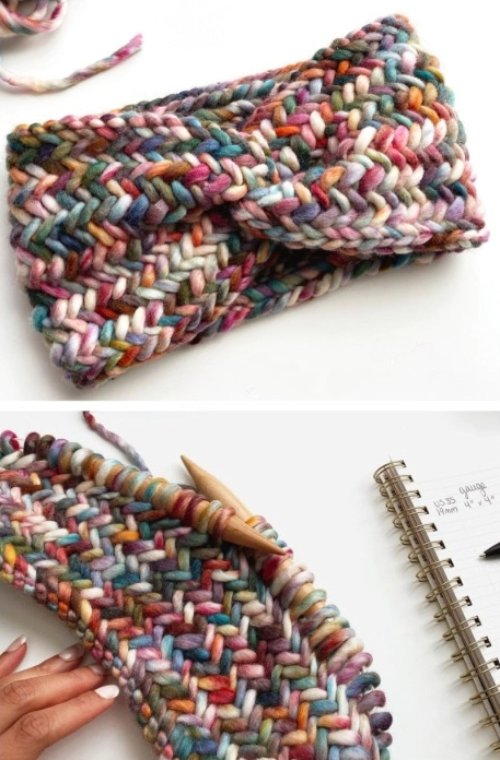
Knit Headband Anyone Can Make

Knit Headband Anyone Can Make
Photos above © Вяжем дома с Татьяной

If you love knitting and want to make a cozy and stylish headband, this is the project for you! This knit headband is easy to make and can be customized to fit any size and color preference. You can also use different stitch patterns to create different textures and designs. To learn how to make this knit headband, watch the video tutorial below and follow the steps. Have fun knitting!

Full Post: Knit Headband

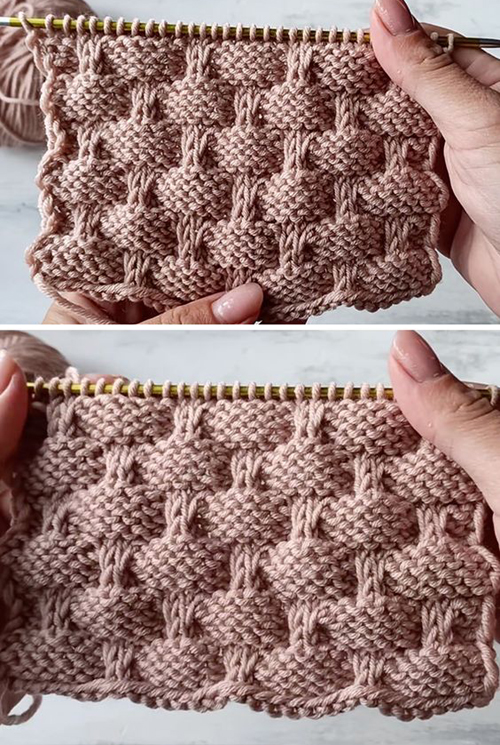
Basket Weave Stitch Knitting Tutorial

Basket Weave Stitch Knitting Tutorial
Photos above © Вяжем дома с Татьяной

What beautiful knitting stitch  (free pattern)! I found it on Pinterest...Learn how to work the basketweave knit stitch by watching this free video tutorial in English subtitles! Keep reading for tips on how to master the technique of knitting this original simple pattern.

Full Post: Basket Weave Stitch

Knitting Flower Stitch - Tutorial

Knitting Flower Stitch - Tutorial
Photos above © Şerifenin Örgü Dünyası

What a beautiful knitting stitch (Free pattern)! This lovely knitting flower stitch is so creative and decorative for many projects. Learn how to work this lovely knitting pattern by watching this tutorial!

Full Post: Flower Stitch 

Checkerboard Knitting Stitch - Tutorial

Checkerboard Knitting Stitch - Tutorial
Photos above © MILALAIM
What a beautiful knitting stitch (Free pattern)! Learn how to work this stylish checkerboard knitting pattern by watching this video tutorial in English subtitles! Keep reading for tips on how to make this pretty knitting stitch.

Full Post: Checkerboard Stitch 

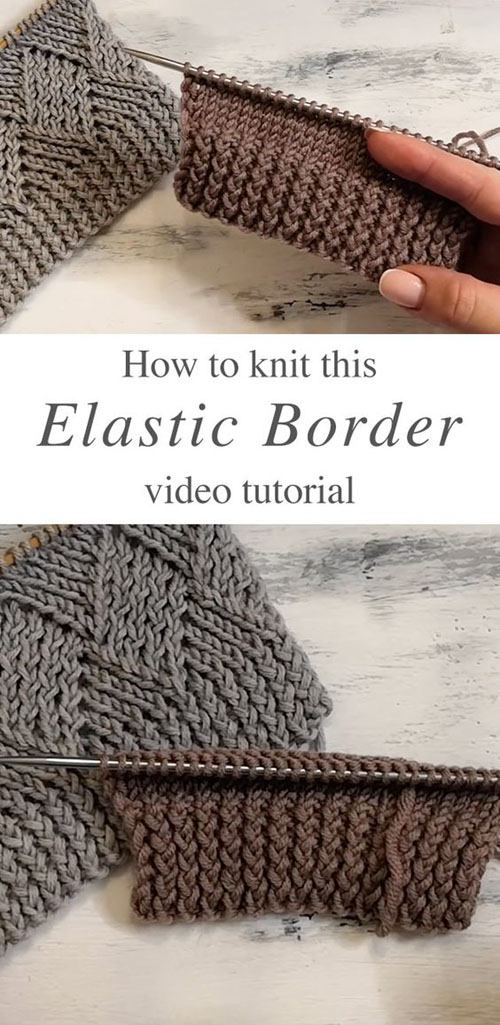
Knit Elastic Border - Tutorial

Knit Elastic Border - Tutorial
Photos above © Вяжем дома с Татьяной

What a beautiful knitting stitch (Free knitting pattern)! I found it on Pinterest. This interesting and very effective knit elastic border comes with braided eye spokes! This stitch makes a beautiful knitting tight pattern!

Full Post: Elastic Border 

Zigzag Knit Pattern - Tutorial

Zigzag Knit Pattern - Tutorial
Photos above © Школа вязания – Наша пряжа – с Катериной Мушин

What a beautiful knitting stitch (Free knitting pattern)! I found it on Pinterest. This interesting and very effective zigzag knit pattern comes with warm bulkiness! Watch this free video tutorial in English subtitles to make the perfect 3D double-sided knitted project.

Full Post: Zigzag Knit Pattern

Knit Zig Zag Stitch - Tutorial

Knit Zig Zag Stitch - Tutorial
Photos above © Mila - Knitting for all

What a beautiful knitted blanket pattern! I found it on Pinterest. This knit zig-zag stitch makes a double-sided single-row pattern that looks the same front and back. This knitted square is made with 12 stitches and 1 row. As a rule of thumb, you cast on a number of stitches and multiply by 12 + 13 for symmetry +2 edges.

Full Post: Zig Zag Stitch 

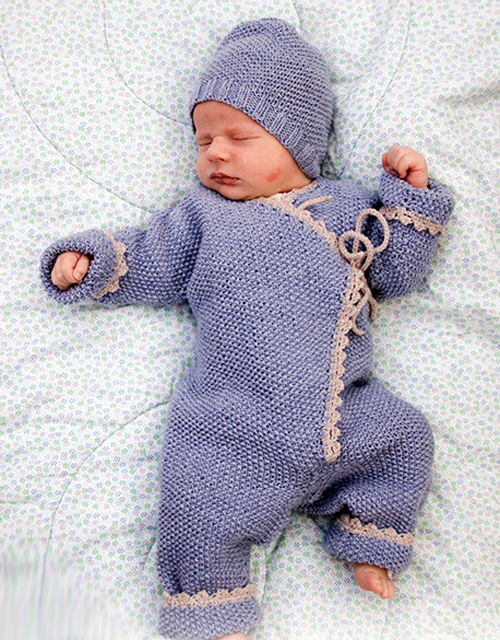
Knitted Overall and Hat - Free Pattern

Knitted Overall and Hat - Free Pattern
The photo above © DROPS Design

What a beautiful knitted baby overall and hat pattern! I found it on Pinterest. "Baby Talk" knitting & designed by DROPS Design. This knit pattern/tutorial is available for free. Knitted overall and hat for baby with moss stitch, garter stitch, and crochet edge. Size overall: 1 month to 2 years Size hat: Premature to 4 years

Full Post: Baby Talk

Odeta Pants - Free Knitting Pattern

Odeta Pants - Free Knitting Pattern
Photos above © DROPS Design

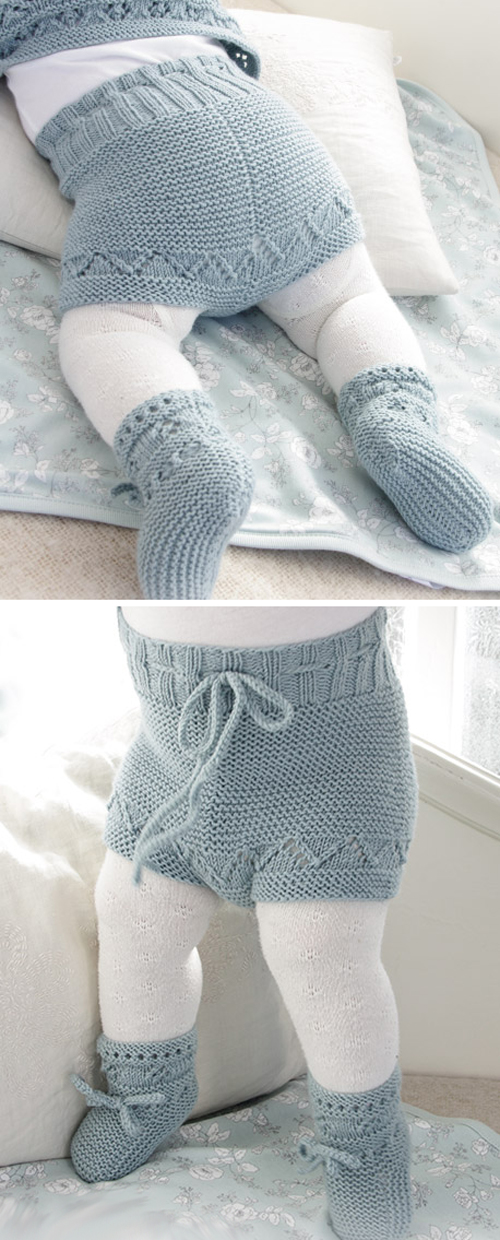
What a beautiful knitted baby shorts and slippers pattern! I found it on Pinterest. Odeta Pants knitting & designed by DROPS Design. This knit pattern/tutorial is available for free. Knitted baby shorts and slippers with lace pattern and garter stitch. Sizes premature - 4 years. 

Full Post: Odeta Pants

Box Stitch - Free Pattern

Box Stitch - Free Pattern
Photos above © Jennifer - Brome Fields
What beautiful knitting Stitch (Free pattern)! I found it on Pinterest...
Learn how to knit the Box Knit Stitch in this Video Tutorial & Free Pattern.

Full Post: Box Stitch

How To Make Rib Stitch Neater - Tutorial

How To Make Rib Stitch Neater - Tutorial
Photos above © Button and Blue

Does your knitting ribbing sometimes look loose, uneven, or less defined than you would like? One simple technique worth trying is twisted rib stitch.

Twisted rib is a variation of ordinary ribbing in which selected stitches are worked through the back loop. This small change twists the stitch and can create sharper, more clearly defined columns — especially around cuffs, sweater hems, neckbands, and hat brims.

Twisted Rib Stitch at a Glance

Technique: Twisted Rib Stitch

Craft: Knitting

Skill Level: Beginner / Easy

Based on: Knit and purl ribbing

Main Technique: Working stitches through the back loop

Best For: Cuffs, hems, neckbands and hat brims

Result: Firm, clearly defined rib columns

Why Does Regular Ribbing Sometimes Look Uneven?

Ribbing looks simple because it is built from basic knit and purl stitches, but achieving perfectly even rib columns can take practice.

One common trouble spot occurs when the working yarn moves between a knit stitch and a purl stitch. That transition can introduce a little extra yarn between stitches, making one side of a rib column appear looser than the other.

Differences between your knit and purl tension can make the effect even more noticeable, particularly in 1x1 and 2x2 ribbing.

What Is Twisted Rib Stitch?

Twisted rib is a variation of standard ribbing. Instead of working every stitch in the usual way, one or more stitches are worked through the back loop.

Working through the back loop changes the orientation of the stitch and creates the characteristic twisted appearance.

On the finished fabric, the knit columns can look narrower and more sharply defined than they do in ordinary ribbing.

How to Knit a Twisted Knit Stitch

The abbreviation ktbl means knit through the back loop.

  1. Keep the working yarn behind your knitting.
  2. Insert the right needle into the back of the next stitch on the left needle.
  3. Wrap the working yarn around the right needle.
  4. Pull the new loop through the stitch.
  5. Slide the old stitch off the left needle.

Unlike an ordinary knit stitch, working through the back loop twists the base of the stitch.

How to Purl Through the Back Loop

You may also encounter the abbreviation ptbl, meaning purl through the back loop.

  1. Bring the working yarn to the front.
  2. Approach the back loop of the next stitch with the right needle.
  3. Wrap the yarn as required for a purl stitch.
  4. Draw the new loop through.
  5. Slide the completed stitch from the left needle.

Purling through the back loop can feel awkward at first. Work slowly until the needle movement becomes comfortable.

Simple 1x1 Twisted Rib

A common way to experiment with twisted rib is to replace the knit stitches in ordinary 1x1 ribbing with knit-through-the-back-loop stitches.

Simple twisted rib repeat:

*K1 tbl, P1; repeat from * across.

This produces twisted knit columns separated by ordinary purl stitches. Depending on the project, pattern, and desired appearance, other twisted-rib variations may twist both knit and purl stitches.

Twisted Rib vs. Regular Rib

Both techniques create vertical ribbing, but the finished fabrics are not identical.

Regular ribbing generally produces a soft, highly elastic fabric. It is the familiar choice for sweater cuffs, hems, neckbands, socks, and hats.

Twisted ribbing tends to create tighter-looking, more defined stitch columns. Because twisting changes the structure of the stitches, however, the fabric can behave differently from ordinary ribbing.

For that reason, twisted rib is not automatically a replacement for every ribbed section. The best choice depends on the look, stretch, and structure you want for the project.

Where Can You Use Twisted Rib?

Twisted rib can be an attractive choice anywhere you want a neat, structured ribbed edge, including:

  • Sweater cuffs
  • Sweater hems
  • Cardigan bands
  • Hat brims
  • Sock cuffs
  • Neckbands
  • Mittens
  • Decorative knitted panels

More Ways to Make Ribbing Look Neater

Twisted stitches are not the only solution for uneven ribbing. If your regular rib stitch still looks loose or irregular, try these simple adjustments:

  • Watch the knit-to-purl transition. Avoid leaving excess slack when moving the yarn.
  • Keep your tension consistent. Uneven knit and purl tension can exaggerate irregular columns.
  • Try smaller needles. Many patterns already use a smaller needle for ribbed cuffs and hems.
  • Experiment with your yarn. Fiber, twist, and elasticity can affect stitch definition.
  • Make a swatch. Compare regular and twisted rib before committing to an entire garment.

Should You Always Use Twisted Rib?

Not necessarily.

Twisting stitches changes more than their appearance. It can also change the elasticity, density, and overall behavior of the fabric.

If a knitting pattern specifically calls for ordinary ribbing, consider making a small swatch before substituting twisted rib. This is particularly important for fitted cuffs, necklines, socks, and other areas where stretch matters.

Practice Before Using It in a Project

The easiest way to understand the difference is to make two small swatches using the same yarn and needles.

Knit one in ordinary 1x1 rib and the other in twisted 1x1 rib. Compare the stitch definition, width, stretch, and overall appearance.

This simple experiment will show you whether twisted rib gives you the result you want for your next project.

Original Tutorial Inspiration

This Amazing Knitting article was originally published after discovering a twisted-rib tutorial from Button and Blue. The original photographs on this page are credited to Button and Blue.

The original external tutorial may no longer be consistently available online, so this page has been expanded with an independent Amazing Knitting explanation of the technique rather than reproducing the original author's tutorial.

More Knitting Stitch Tutorials

Continue learning with more knitting stitch tutorials, rib stitch ideas, and knitting stitches from the Amazing Knitting archive.

Two Needle Socks - Free Knitting Pattern

Two Needle Socks - Free Knitting Pattern
Photos above © Katerina Mushyn
What beautiful knitting socks pattern! I found it on Pinterest...
Garter stitch socks knit flat and seamed. Video tutorial included. Designed by Katerina Mushyn. Available in English and Russian.

Full Post: Two Needle Socks 

Beautiful Knitting Stitch Pattern For Cardigan - Tutorial

Beautiful Knitting Stitch Pattern For Cardigan - Tutorial
Photos above © knit with me
What beautiful knitting stitch (free knitting pattern)! I found it on Pinterest... With The Help Of This Step By Step Guided Video Tutorial, You Will Learn Beautiful Knitting Stitch Pattern For Cardigans. It’s a Very Beautiful Knitting Project Which Can Be Done By Beginner Knitters. This Knitting Stitch Will Also Help You In Crocheting Hats, Scarfs, Blankets, And Many Interesting Knitting Projects. Try This Lovely Knitting Creation For Free Below.

Full Post: Beautiful Knitting Stitch

Discover More From the Archive

A fresh mix of knitting patterns and tutorials from the Amazing Knitting archive.

Finding patterns from the archive…