 |
| Photos above © Terhi |
What beautiful knit wrap top pattern! I found it on Flickr...
An adorable knit Pattern by Erika Knight / Simple Knits for cherished Babies. This wrap top is so sweet and easy to knit.
Full Post: Garter Stitch Wrap Top

|
| Photos above © Terhi |
 |
| The photo above © Jade Fletcher |
 |
| Photos above © Katie Ahlquist |
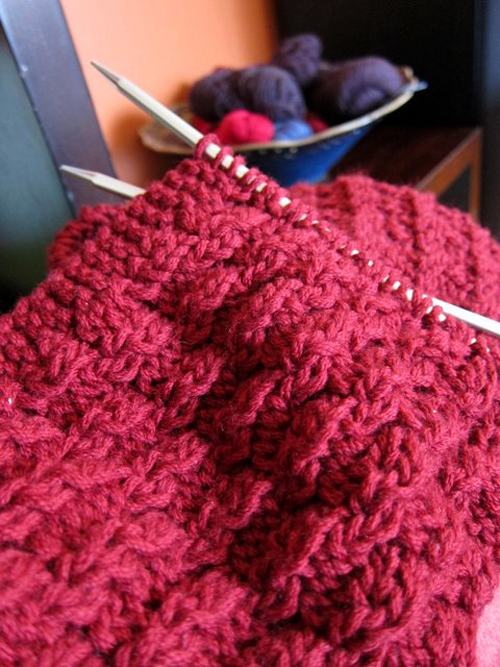 |
| The photo above © Shana Schasteen |
 |
| Photos above © Interweave Knits |
 |
| Photos above © POF |

Autopilot Cowl. Photo © Dominique Trad
Autopilot Cowl by Dominique Trad is a free, relaxing cowl knitting pattern built around an easy 2-row repeat. Worked seamlessly in the round with worsted-weight yarn, it's designed for the kind of knitting you can enjoy while traveling, watching TV or chatting at knit night.
The combination of simple eyelets and mesh creates an attractive textured fabric without a complicated stitch sequence. Better still, the designer provides guidance for adjusting both the width and circumference, so you can customize the finished cowl to suit your preferred fit.
The main attraction of Autopilot is its wonderfully repetitive stitch pattern. The cowl uses a 2-row repeat, creating an attractive open texture without requiring you to keep track of a long sequence of rows.
That's exactly where the name comes from. Dominique Trad designed the project for relaxed knitting: something that lets you enjoy beautiful yarn while your hands settle into a comfortable rhythm.
It can be an especially appealing project for knitting while commuting, traveling, watching television or spending time with other knitters.
Autopilot is worked in the round from the bottom up. The cowl is knitted as one continuous piece, so there is no long seam to sew after the knitting is finished.
Working in the round also makes the repeating stitch pattern particularly satisfying once you become familiar with it: simply continue around the cowl while the textured mesh fabric develops on your needles.
Although the pattern is intentionally simple, the finished fabric has plenty of visual interest.
Eyelets create an airy mesh-like texture that works especially well with soft worsted-weight yarn. The repeated openings also help the fabric drape rather than becoming too dense around the neck.
This makes Autopilot a good example of how a very short stitch repeat can produce a finished accessory that looks much more intricate than the knitting experience suggests.
The original pattern is designed for worsted-weight / 10-ply yarn and suggests Malabrigo Rios.
Rios is a worsted-weight merino yarn, and its hand-dyed colorways can work beautifully with the simple textured structure of this cowl.
The pattern calls for approximately 328–437 yards (300–400 metres), depending on how you customize the project.
Yes. One of the useful features of Autopilot is its flexibility. Dominique Trad designed the original version for worsted-weight yarn, but notes that the cowl can be made with other yarn weights as well.
Changing yarn weight will affect the finished fabric, dimensions and needle requirements, so treat the original worsted version as your reference point and adjust accordingly.
This flexibility can also make the pattern useful when you have a special yarn in your stash and want a straightforward project that allows the yarn itself to be the focus.
The original worsted-weight version uses:
Because the cowl is worked in the round, use circular needles with a cable length appropriate for your chosen circumference.
Although the pattern is written with one basic size, the designer provides the information needed to customize both the width and circumference.
This means you are not limited to reproducing the sample exactly. You can adjust the dimensions depending on how you want to wear your finished cowl and how much yarn you have available.
A longer circumference can create a generously draped cowl that can be wrapped around the neck, while a shorter version can be worn closer to the neck.
A simple repeating pattern can be an excellent partner for colorful yarn because the stitch pattern doesn't compete with the yarn.
Autopilot works beautifully in solid colors, but it can also showcase tonal, hand-dyed or variegated worsted yarns. The eyelets and mesh add texture while allowing color changes to remain visible.
The pattern is straightforward, but you should be comfortable with a few basic techniques before beginning.
Useful skills include:
The designer specifically recommends using a stretchy bind-off or binding off loosely.
This is worth paying attention to. A bind-off that is significantly tighter than the knitted fabric can restrict the edge and affect how comfortably the cowl sits or wraps around the neck.
Autopilot is a particularly appealing pattern when you want knitting that feels relaxing without producing a completely plain accessory.
The 2-row repeat is easy to settle into, while the eyelet texture, seamless construction and customizable dimensions keep the finished cowl interesting.
It can also be a useful project between more complicated sweaters, shawls or lace patterns when you want something you don't need to concentrate on constantly.
Autopilot has become a well-established free knitting pattern since its publication in 2015, with knitters creating it in many different yarns, colors and dimensions.
Its combination of a memorable 2-row repeat and flexible sizing makes it particularly easy to personalize while retaining the character of Dominique Trad's original design.
The complete Autopilot Cowl by Dominique Trad is currently available as a free downloadable knitting pattern from the designer's Ravelry page.
Get the Free Autopilot Cowl Knitting Pattern
Pattern availability was checked when this article was updated. Availability on external websites may change over time.
 |
| Photos above © Jessica - Mama In A Stitch |
 |
| Photos above © echtstudio |

The Pink Lady Baby Cardigan by Marta Porcel of Creativa Atelier is a charming baby sweater with an unusual sideways construction. Instead of beginning at the neckline or lower edge, the cardigan starts at one sleeve and is worked across the body before finishing with the second sleeve.
The design combines garter stitch with the reverse side of stockinette stitch, creating a soft textured contrast across the garment.
A complete step-by-step tutorial for the 3-month size is currently available free from Creativa Atelier. Additional baby and child sizes are available separately as paid PDF patterns.
Design, images and original pattern © Marta Porcel / Creativa Atelier.
The most distinctive feature of Pink Lady is its construction.
Instead of starting at the neck or hem, the project begins with one sleeve. Extra stitches are then added to form the front and back of the cardigan before the knitting continues sideways across the body.
After shaping the neckline and front opening, the body is completed and the second sleeve is worked at the opposite end.
This creates a garment with vertical rather than conventional horizontal construction.
Sideways knitting changes the direction of the stitches across the finished cardigan.
It also allows the sleeves and body to form part of one continuous piece rather than requiring separate sleeve pieces to be knitted and attached later.
For knitters who have already made traditional bottom-up or top-down baby cardigans, Pink Lady offers a noticeably different construction method.
The cardigan combines two simple textures: garter stitch and reverse stockinette stitch.
Garter stitch creates a soft ridged fabric, while reverse stockinette uses the purl side of traditional stockinette as the visible surface.
This contrast gives the finished cardigan a distinctive appearance without requiring cables, lace or stranded colorwork.
The free 3-month tutorial uses:
1 ball of Katia Merino Classic, 100 g / approximately 240 m.
The yarn is classified as DK / Light weight.
A similar DK yarn can be substituted as long as you can achieve a comparable gauge and create a soft fabric suitable for a baby garment.
For a baby cardigan, consider yarn that is:
Always make a small gauge swatch when changing yarn, because differences in fiber and thickness can affect the final size.
The designer notes that you may need to adjust the needle size if necessary to obtain the intended tension.
The designer lists:
20 stitches × 38 rows in garter stitch.
Gauge is important for a baby cardigan because the construction depends on specific widths and lengths as the knitting moves sideways across the garment.
If your stitches are significantly larger or smaller, the finished cardigan may not match the intended 3-month size.
The project begins at the cuff of the first sleeve.
The sleeve is knitted to the required length before additional stitches are added at both ends to create the front and back sections of the cardigan.
From this point, the work begins to resemble a sideways garment rather than a traditional sleeve.
Once the body stitches have been added, different stitch textures are used across the row.
The central sleeve and shoulder area uses garter stitch, while sections of the body use reverse stockinette.
This contrast helps define the structure of the cardigan visually.
The neckline is shaped while working across the garment.
A section of stitches is bound off to create the opening, allowing the front and back portions to be worked separately for part of the construction.
This is one of the areas where it is especially useful to follow the designer's original step-by-step tutorial carefully.
The cardigan has a simple front opening secured with one button.
A buttonhole is incorporated into the smaller front section before the pieces are rejoined.
The single-button closure keeps the overall design clean and minimal.
After the body is complete, stitches are bound off at both sides until only the sleeve stitches remain.
The second sleeve is then knitted to match the first.
This completes the main sideways piece of the cardigan.
Once the knitting is complete, the sleeve and side seams are joined with a tapestry needle.
The button is then attached to the front.
The designer also discusses an optional lower hem to help control curling along the bottom edge.
The individual stitches are relatively simple, so a confident beginner who already knows how to knit and purl can learn a lot from this project.
The unusual sideways construction requires more concentration than a basic rectangular project, especially around the neckline and front opening.
Fortunately, the designer provides a detailed photographic tutorial that shows how the garment develops step by step.
The important availability detail is that the 3-month size is available free in the online tutorial.
Creativa Atelier also offers additional pattern sizes:
The expanded sizes and printable PDF editions are sold separately by the designer.
Yes, the complete online tutorial for the 3-month Pink Lady Baby Cardigan is currently available free from Creativa Atelier.
Larger baby and child sizes are available as paid PDF patterns from the same designer.
Amazing Knitting therefore links directly to Creativa Atelier, the original designer source, rather than to third-party copies.
View the Free Pink Lady Baby Cardigan Tutorial →
Creativa Atelier also offers paid downloadable PDF patterns for additional baby and child sizes.
These PDFs include detailed sizing information and printable row-by-row instructions.
View All Pink Lady Size Options →
Pink Lady stands out because it teaches a different way of thinking about garment construction.
Rather than building the cardigan vertically from neck to hem or hem to neck, the sweater grows sideways from one sleeve to the other.
The use of garter stitch and reverse stockinette also gives the design a distinctive handmade texture without adding technically difficult stitch patterns.
For knitters who already understand basic stitches and want to explore a more unusual baby sweater construction, Pink Lady is an interesting next project.
Amazing Knitting links readers to legitimate designer or publisher sources whenever possible. Pattern prices, download locations and availability can change after an article is published.
Read Our Pattern Availability Policy →
Amazing Knitting is an independent pattern discovery and project-guide site. The Pink Lady Baby Cardigan design, images and complete knitting instructions remain the intellectual property of Marta Porcel / Creativa Atelier. This guide does not reproduce the designer's complete row-by-row pattern instructions.
 |
| Photos above © vampomatic |

Lacy Baktus by Terhi Montonen. Photo © Terhi Montonen.
Lacy Baktus by Terhi Montonen is a beautifully simple triangular scarf that combines the easy-to-wear Baktus shape with delicate rows of eyelet lace.
Worked sideways in fingering-weight yarn, the scarf gradually grows wider and then narrows again, creating a long triangular shape that is easy to wrap around the neck.
Best of all, Lacy Baktus is still available as a free knitting pattern, making this classic design an excellent choice for using a beautiful skein of sock or fingering-weight yarn.
A Baktus is a long, narrow triangular scarf that is generally worked sideways rather than from the top down like many traditional triangular shawls.
The basic idea is wonderfully practical: begin at one narrow point, gradually increase until the scarf reaches its widest point, then decrease toward the opposite point.
The result is a scarf with long tapered ends that can be wrapped comfortably around the neck without the bulk of a large shawl.
Terhi Montonen's design is a lace variation of the original Baktus Scarf by Strikkelise.
The Lacy Baktus version was published with permission from Strikkelise and adds decorative eyelets to the familiar sideways triangular shape.
This small change gives the scarf a lighter and more decorative appearance while preserving the simple construction that made the original Baktus style so popular.
One of the most appealing features of Lacy Baktus is its sideways construction.
Instead of casting on the entire long edge of a triangular shawl, you begin with only a few stitches at one end.
Increases gradually make the scarf wider. After reaching the desired midpoint, corresponding decreases narrow the fabric toward the second point.
This construction creates the characteristic elongated triangle without requiring a huge cast-on.
Sideways construction has another practical advantage: it can make yarn management easier.
Because the scarf grows from one point toward the center, you can monitor how much yarn you are using as the project progresses.
For projects where you want to make efficient use of a special skein, this style of construction can be particularly attractive.
Lacy Baktus gets its decorative character from rows of eyelets.
The lace does not turn the scarf into an extremely delicate formal shawl. Instead, the eyelets provide an open accent against the simple knitted fabric.
This makes the pattern a useful introduction for knitters who want to move beyond basic garter stitch and begin experimenting with simple lace.
Garter stitch is particularly suitable for a scarf because it creates a reversible fabric that naturally lies relatively flat.
It also provides a strong textural contrast with the open eyelet rows.
For a long scarf that may twist and turn while being worn, having an attractive fabric on both sides is a practical advantage.
The pattern is listed for fingering-weight yarn, making it a natural project for sock yarn and other lightweight yarns.
The suggested yarn is Sterling Ridge Studio Super Squish Sock, a 100% Merino fingering-weight yarn with approximately 440 yards per 100 grams.
You do not necessarily need to use the original yarn. A suitable fingering-weight substitute can give the scarf its own character.
Lacy Baktus can be especially appealing when you have a skein of sock yarn that is too beautiful to hide inside shoes.
Hand-dyed, tonal and gently variegated yarns can all work well in a simple scarf because the uncomplicated construction gives the yarn room to become part of the design.
If your yarn has very dramatic color changes, consider how they will interact with the eyelet sections before starting.
When substituting yarn, begin with the recommended fingering weight, but do not rely on the yarn label alone.
Also consider:
Since a scarf is worn directly against the neck, softness can be just as important as appearance.
The listed needle size is approximately US 2½ / 3.0 mm.
Treat this as a starting point rather than an absolute rule. Your own knitting tension and yarn substitution can affect the fabric you produce.
For a scarf, you generally want a fabric with enough flexibility to wrap comfortably rather than one that feels overly stiff.
Lacy Baktus can be a very approachable first lace project for a knitter who already knows the basic knit stitch and is ready to learn simple shaping and eyelets.
The construction is considerably less intimidating than many elaborate lace shawls because the overall scarf shape remains straightforward.
The main challenge is keeping the increases, decreases and eyelet placement consistent as the scarf changes width.
It helps to be comfortable with:
If yarn overs are new to you, practice a few on a small swatch before starting the scarf.
Consistent shaping is important in a sideways triangular scarf.
A row counter, removable marker or simple note on paper can help you keep track of when increases, decreases and eyelet rows should occur.
This is especially useful once the knitting becomes relaxing and it is easy to lose track of where you are in the repeat.
The midpoint is an important stage in any Baktus-style scarf because this is where the project changes from becoming wider to becoming narrower.
Before beginning the decreasing half, make sure you are satisfied with the size and have enough yarn to complete the second half.
Following the original pattern carefully will help preserve the intended proportions.
Variegated sock yarn can create striking effects in a sideways scarf.
Because the rows become progressively longer and then shorter, the way colors pool and stripe may change across the scarf.
That variation can become part of the charm of the finished project, particularly with hand-dyed yarn.
Solid and tonal yarns are excellent choices when you want the lace eyelets to remain especially visible.
Without strong color changes competing for attention, the simple geometry of the scarf and the open lace details can become the main visual features.
Blocking can help the finished scarf settle into its triangular shape and make the eyelet details more visible.
The amount of blocking required depends on the yarn fiber. Wool and other animal fibers often respond particularly well, while other fibers may require different treatment.
Always follow the care instructions for your chosen yarn.
The elongated triangular shape offers several styling options.
Because it is narrower than many full-sized triangular shawls, it can be particularly convenient for everyday wear.
Lacy Baktus was published in 2009 and has remained popular with knitters for many years.
Thousands of projects have been associated with the design, showing how effectively a simple construction can be transformed through different yarns and color choices.
It is a good reminder that an enjoyable knitting pattern does not need complicated construction to produce an attractive finished accessory.
Lacy Baktus by Terhi Montonen is currently listed as a free knitting pattern.
The pattern is written in English and the current Ravelry record provides access to the designer's original pattern information.
Get the Free Lacy Baktus Pattern →
Lacy Baktus is designed by Terhi Montonen and is a lacy variation of the Baktus Scarf by Strikkelise, published with permission. Amazing Knitting does not reproduce the copyrighted pattern instructions. Pattern availability is controlled by the designer or current pattern host.